

使用nginx部署前端项目,路由模式采用history模式时,刷新页面之后,显示404。
路由模式
前端路由的基本作用为:
①当浏览器地址变化时,切换页面;
②点击浏览器后退、前进按钮时,更新网页内容;
③刷新浏览器页面时,网页加载与当前路由相匹配的内容。
在前端项目开发中,主要使用到两种路由模式:
【1】hash模式:通过监听浏览器地址hash值,在回调函数中切换网页内容/部分内容;
【2】history模式:基于history API自定义url地址,实现url地址变化并保证网页内容的切换。
hash模式
基本原理
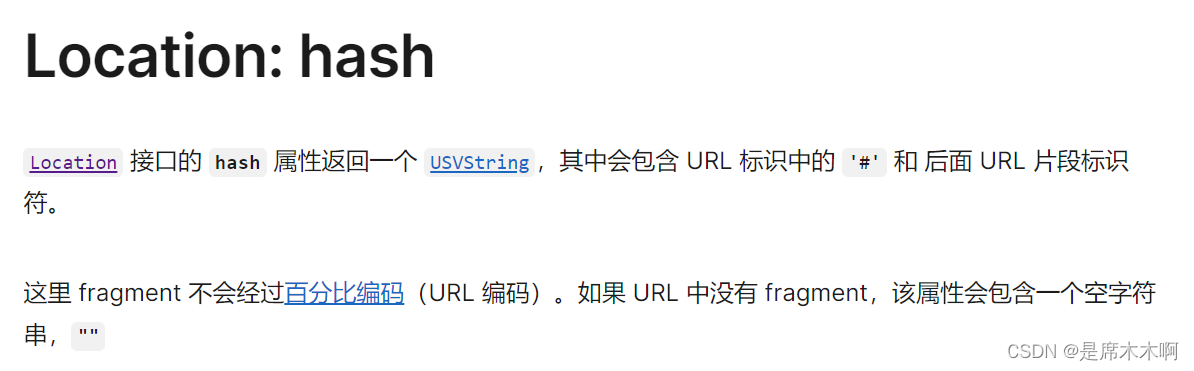
使用window.location.hash属性及窗口的onhashchange事件,可以实现监听浏览器地址hash值变化,执行相应的js切换网页。

hash模式的特点如下:
①hash指的是地址中#号以及后面的字符,也称为散列值。hash也称作锚点,本身是用来做页面跳转定位的。如http://localhost/index.html#abc,这里的#abc就是hash;
②散列值是不会随请求发送到服务器端的,所以改变hash,不会重新加载页面;
③ window 的 hashchange 事件作用:当散列值改变时,可以通过 location.hash 来获取和设置hash值;
④location.hash值的变化会直接反应到浏览器地址栏。
hash路由触发条件
那么,如何触发hash路由呢?主要分为编程式触发(例如:通过a标签设置锚点、js代码级动态更新)和手动触发(例如:点击浏览器的前进/后退按钮),
①当浏览器地址栏的散列值/hash值变化时,会自动触发location..hash属性值的变化,从而触发onhashChange事件。
②当只改变浏览器地址栏URL的哈希值时,按下enter键不会导致浏览器向服务器发送请求,此时仅仅是设置hash值,并触发onhashChange事件。
③HTML提供的a标签,通过其href属性可以为页面设置锚点,当点击a标签时,可以跳转到对应元素所在区域,同时更新地址栏hash值(伴随着Location.hash属性值的更新),并触发onhashChange事件。
example-基础示例
代码示例:
<!DOCTYPE html>
<html lang="en">
<head><meta charset="UTF-8"><meta name="viewport" content="width=device-width, initial-scale=1.0"><title>hash模式</title><style>.box{margin:15px;min-height: 100vh;width: 100%;background-color: skyblue;}</style>
</head>
<body><div class="box" id="part_1">part_1</div><div class="box" id="part_2">part_2</div><a href="#part_1">to_part_1</a><a href="#part_2">to_part_2</a><script>window.onhashchange = (event)=>{console.log('hash:',window.location.hash,event)}</script>
</body>
</html>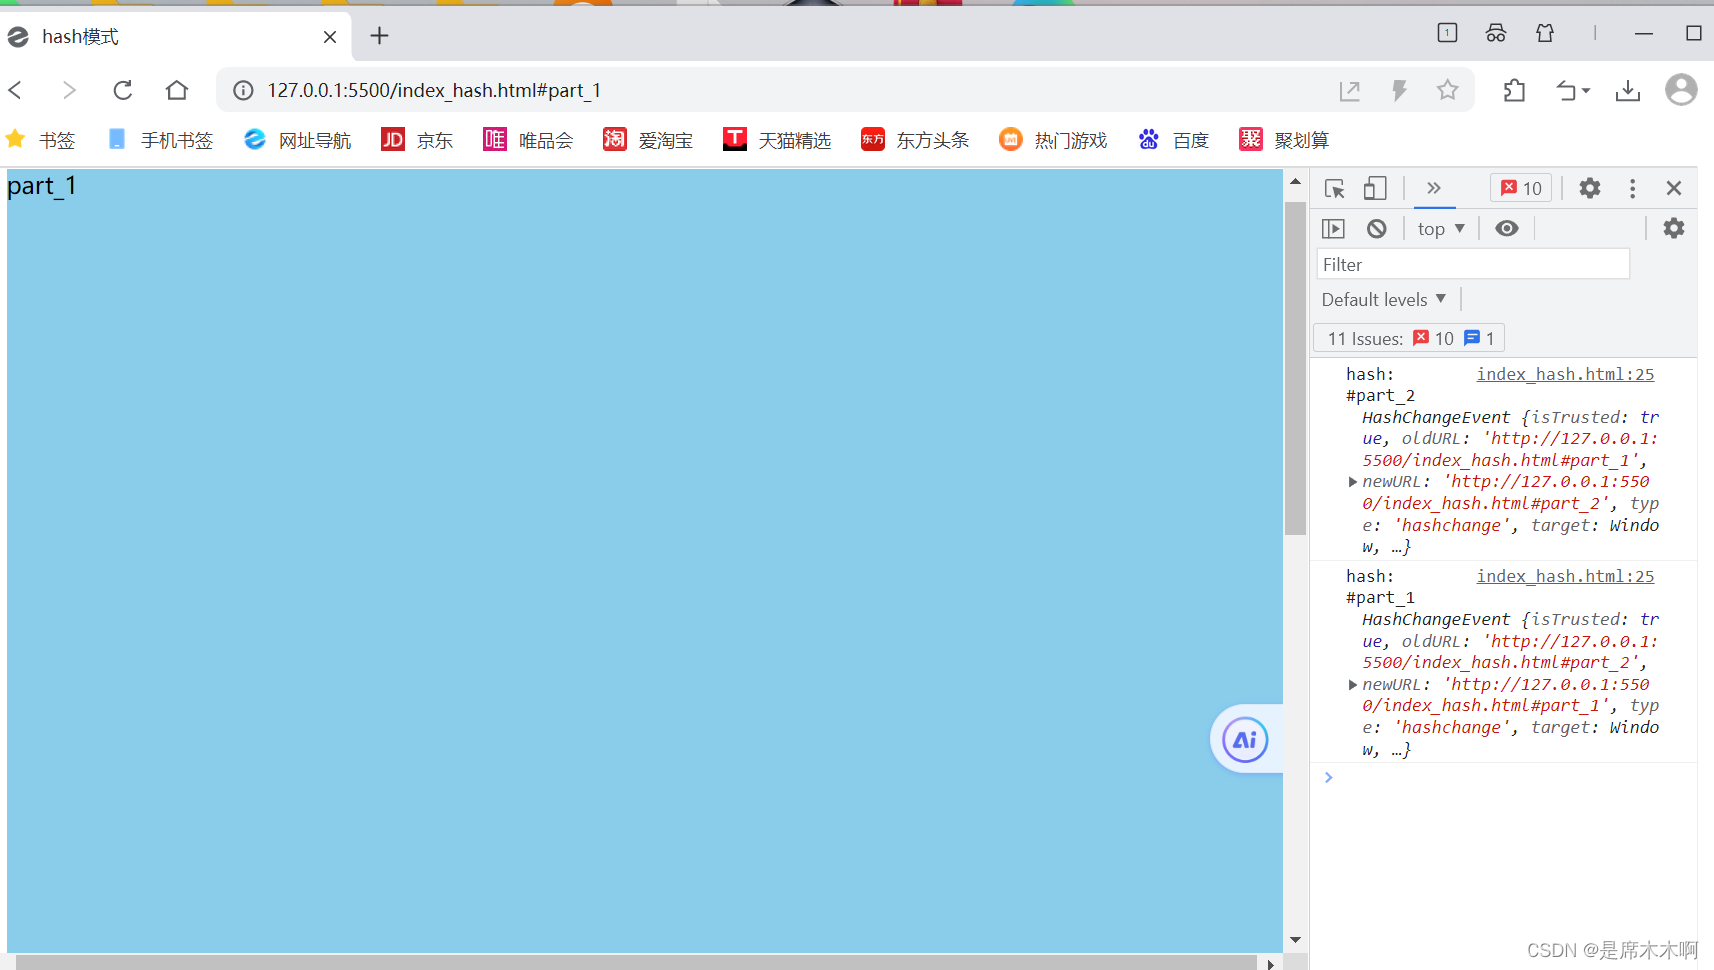
example-hash-Router
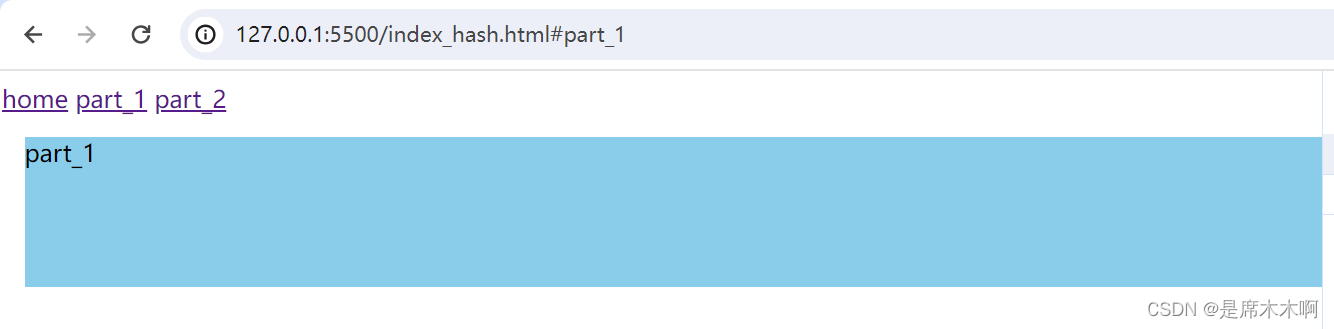
模拟简单的hash路由,
<!DOCTYPE html>
<html lang="en"><head><meta charset="UTF-8"><meta name="viewport" content="width=device-width, initial-scale=1.0"><title>hash模式</title><style>.box {margin: 15px;min-height: 100px;width: 100%;background-color: skyblue;}</style>
</head><body><a href="#home">home</a><a href="#part_1">part_1</a><a href="#part_2">part_2</a><div id="app"></div><!-- HTML 内容模板(<template>)元素是一种用于保存客户端内容机制,该内容在加载页面时不会呈现,但随后可以 (原文为 may be) 在运行时使用 JavaScript 实例化。 --><template id="home"><div class="box" id="home">home</div></template><template id="part_1"><div class="box" id="part_1">part_1</div></template><template id="part_2"><div class="box" id="part_2">part_2</div></template><script>//根节点const rootNode = document.getElementById("app")//刷新页面方法const refreshApp = (hash) => {hash = hash || 'home'const elem = document.getElementById(hash);rootNode.innerHTML = elem.innerHTML}//hash-change事件监听window.onhashchange = (event) => {console.log('hash:', window.location.hash, event)//根据hash值显示对应的页面部分const hash = window.location.hash.replace("#", '');refreshApp(hash)}//初始事件监听document.body.onload = () => {const hash = window.location.hash.replace("#", '');refreshApp(hash)}</script>
</body></html>
优缺点
- 优点:浏览器兼容性较好,连 IE8 都支持
- 缺点:路径在井号
#的后面,比较丑
history模式
基本原理|History对象
history模式基于history API实现。
history API 是 H5 提供的新特性,允许开发者直接更改前端路由,即更新浏览器 URL 地址而不重新发起请求。

关于History对象,
①window.history 属性指向 History 对象,它表示当前窗口的浏览历史。当发生改变时,只会改变页面的路径,不会刷新页面。
②History 对象保存了当前窗口访问过的所有页面网址。通过 history.length 可以得出当前窗口一共访问过几个网址。
③由于安全原因,浏览器不允许脚本读取这些地址,但是允许在地址之间导航
④浏览器工具栏的“前进”和“后退”按钮,其实就是对 History 对象进行操作。
history路由触发条件
每当 history 对象出现变化时,就会触发 popstate 事件。

①仅仅调用pushState()方法或replaceState()方法 ,并不会触发该事件;
②只有用户点击浏览器倒退按钮和前进按钮,或者使用 JavaScript 调用History.back()、History.forward()、History.go()方法时才会触发。
③另外,该事件只针对同一个文档,如果浏览历史的切换,导致加载不同的文档,该事件也不会触发。
④页面第一次加载的时候,浏览器不会触发popstate事件。
example-history-Router
<!DOCTYPE html>
<html lang="en">
<head><meta charset="UTF-8"><meta name="viewport" content="width=device-width, initial-scale=1.0"><title>history模式</title><style>.box {margin: 15px;min-height: 100px;width: 100%;background-color: skyblue;}</style>
</head>
<body><nav id="nav"><a href="javascript:void(0)">home</a><a href="javascript:void(0)">part_1</a><a href="javascript:void(0)">part_2</a></nav><div id="app"></div><!-- HTML 内容模板(<template>)元素是一种用于保存客户端内容机制,该内容在加载页面时不会呈现,但随后可以 (原文为 may be) 在运行时使用 JavaScript 实例化。 --><template id="home"><div class="box" id="home">home</div></template><template id="part_1"><div class="box" id="part_1">part_1</div></template><template id="part_2"><div class="box" id="part_2">part_2</div></template><script>//获取节点const rootNode = document.getElementById("app")const navlement = document.querySelector('#nav')//刷新页面方法const refreshApp = (path) => {path = path || 'home'const elem = document.getElementById(path);rootNode.innerHTML = elem.innerHTML}navlement.onclick = (event)=>{const target = event.target;if(target.nodeName !== 'A'){return}const path = target.textContentconsole.log(path)// history.pushState(),改变当前地址栏的路径,并不会更新页面内容history.pushState(null,null,path)refreshApp(path)}//onpopstate-事件:监听-点击浏览器的前进按钮/后退按钮window.onpopstate = (event)=>{console.log(event)//}</script>
</body>
</html>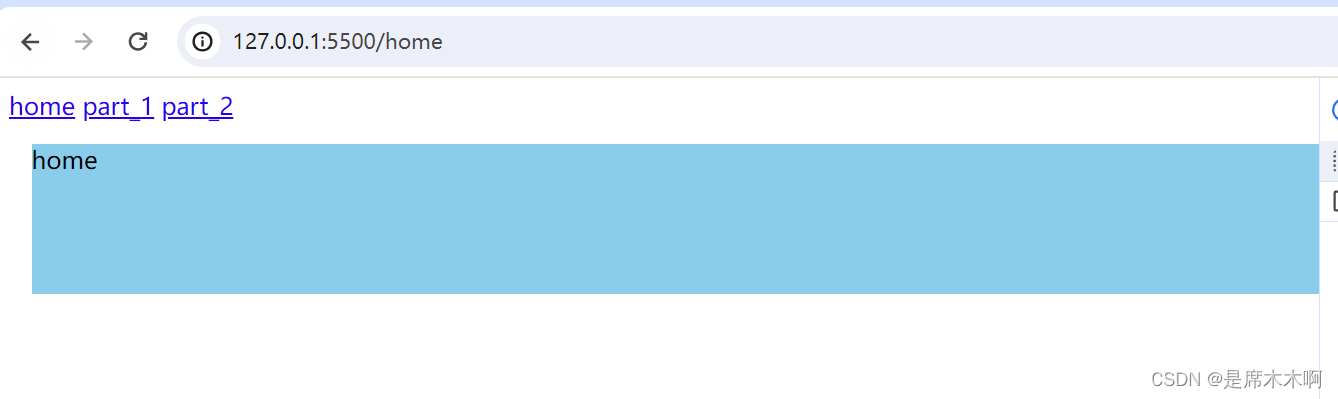

优缺点
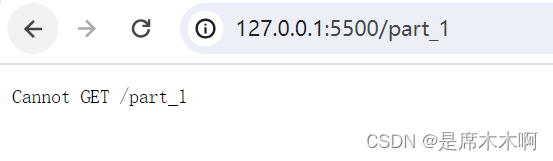
history 致命的缺点就是当改变页面地址后,强制刷新浏览器时,(如果后端没有做准备的话)会报错,因为刷新是拿当前地址去请求服务器的,如果服务器中没有相应的响应,会出现 404 页面。
例如:拿live-server来讲,保存页面时,导致页面刷新,进而显示找不到页面。
Nginx相关配置
Nginx+History路由模式:404问题
通常,我们使用nginx部署前端项目时,简单配置如下,
worker_processes  1;
events {worker_connections  1024;
}http {include       mime.types;default_type  application/octet-stream;sendfile        on;keepalive_timeout  65;#服务配置server {listen       8157;server_name  localhost;#前端项目部署配置location / {root   /home/server_dir/erp/web;index  index.html index.htm;}}
}
但是,当前端项目使用History路由模式进行打包时,每当我们刷新页面,就会显示404找不到,那么,如何在服务端解决这个问题呢?
相关配置
location:root根目录配置
用户请求的最终结果是要返回数据,当响应文件在 Nginx 服务器本地时,需要进行本地文件位置、读或写、返回执行结果的操作。Nginx 中的 root 指令可以设定请求 URL 的本地文件根目录,如下表所示。

例如:
location /flv/ {root /data/web;
}
当 root 指令在 location 指令域时,root 设置的是 location 匹配访问路径的上一层目录,样例中被请求文件的实际本地路径为 /data/web/flv/。
Tips:location 中的路径是否带"/",对本地路径的访问无任何影响。
location:alias虚拟目录配置
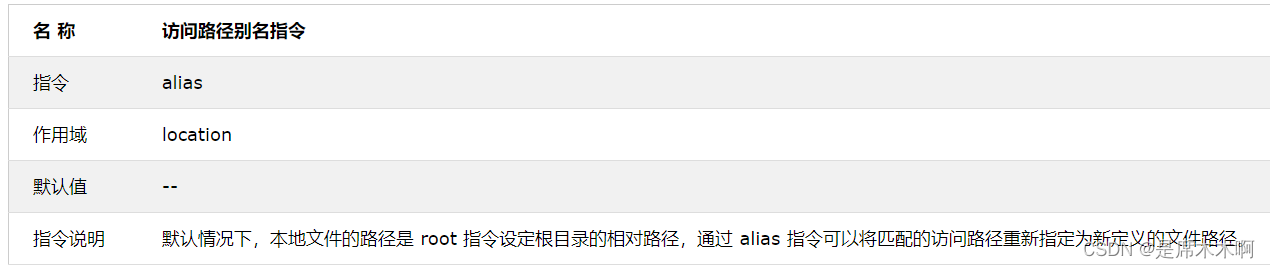
Nginx 中想要配置虚拟目录可以使用 alias 指令,该指令的介绍如下表所示:
例如:
server{listen 8080;server_name www.nginxtest.org;root /opt/nginx-web/www;location /flv/ {alias /opt/nginx-web/flv/;}location /js {alias /opt/nginx-web/js;}location /img {alias /opt/nginx-web/img/;}
}
可以用如下命令分别进行访问测试:
curl http://127.0.0.1:8080/flv/
curl -L http://127.0.0.1:8080/js
curl http://127.0.0.1:8080/js/
curl -L http://127.0.0.1:8080/img
curl http://127.0.0.1:8080/img/
alias 指定的目录是 location 路径的实际目录,其所在 location 的 rewrite 指令不能使用 break 参数。
location:try_files
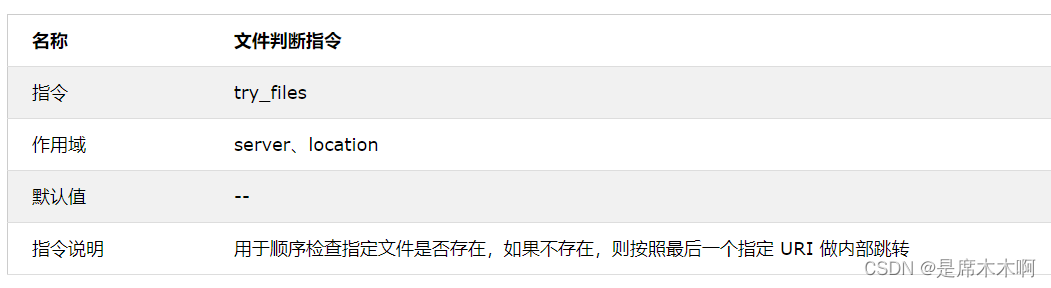
try_files 指令是在 Nginx0.7.27 版本中开始加入的,它可以按顺序检查文件是否存在,并返回第一个找到的文件,如果未找到任何文件,则会调用最后一个参数进行内部重定向,如下表所示:
例如:
location /images/ {# $uri存在则执行代理的上游服务器操作,否则跳转到default.gif的locationtry_files $uri /images/default.gif;
}location = /images/default.gif {#expires配置可以控制页面资源在浏览器缓存的时间。在指定事件内再次访问该静态资源,将不再像nginx发送请求,而是直接从浏览器缓存中获取expires 30s;
}
解决方案:alias+try_files
可以将前述部署配置改为,即可解决。
worker_processes  1;events {worker_connections  1024;
}http {include       mime.types;default_type  application/octet-stream;sendfile        on;keepalive_timeout  65;server {listen       8157;server_name  localhost;#前端项目部署location / {# root   /home/server_dir/erp/web;alias  /home/server_dir/erp/web/;index  index.html index.htm;try_files $uri $uri/ /index.html;}}}